Official Luthiers Forum!
http://www-.luthiersforum.com/forum/

Ready to inlay rosette--pics inside...
http://www-.luthiersforum.com/forum/viewtopic.php?f=10102&t=5021
Page 1 of 1

Author:  John Elshaw [ Fri Feb 10, 2006 8:53 am ]
Post subject: 

Well, I decided to take a day off from work today and mess around in the basement. I finally was able to finish some rosette tiles and rope border. Here is my process:

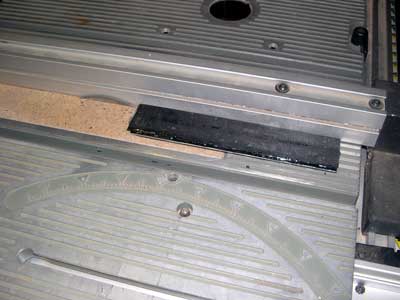
Thin the veneers to size using the drill press sanding jig (shown later). Then cut the veneers to size, approx 10" x 2".


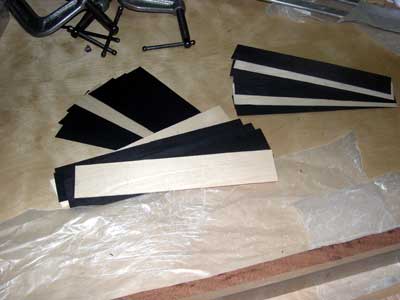
Next, stack the veneers in the correct sequence and glue up using epoxy (water based glues expand the veneer way too much. It will mess up your pattern)


Veneer sandwiches ready to be cut.


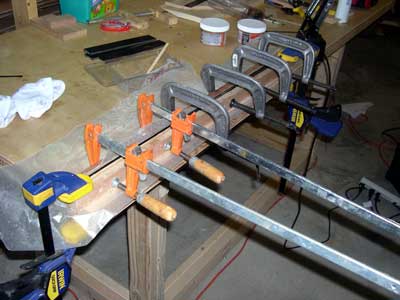
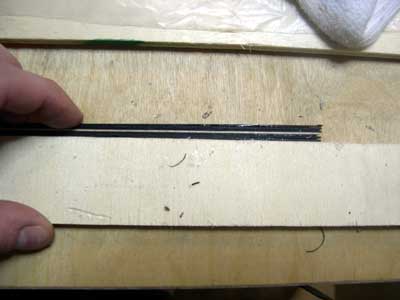
Here I cut thin strips off the sandwich which are glued up again to make the final pattern. I'm using my fret slotting blade with a blade support from Lee Vally. The strips come off smooth as silk and very uniform.


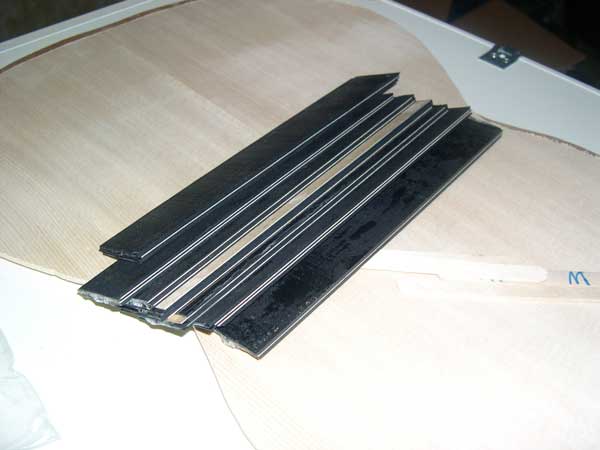
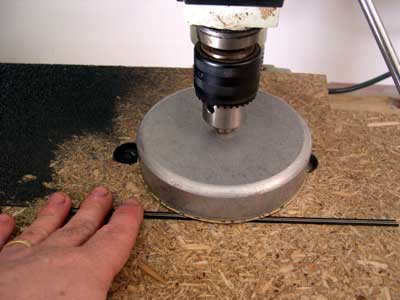
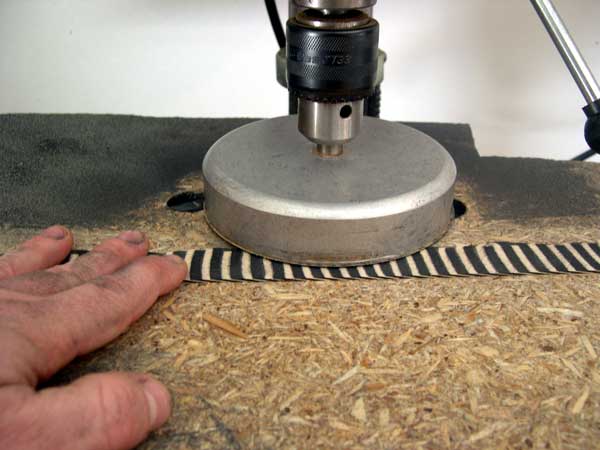
Each individual strip is taken to the drill press and thicknessed down to .030" and prepared for glue-up.


Here are all the individual strips thicknessed and ready for glueing


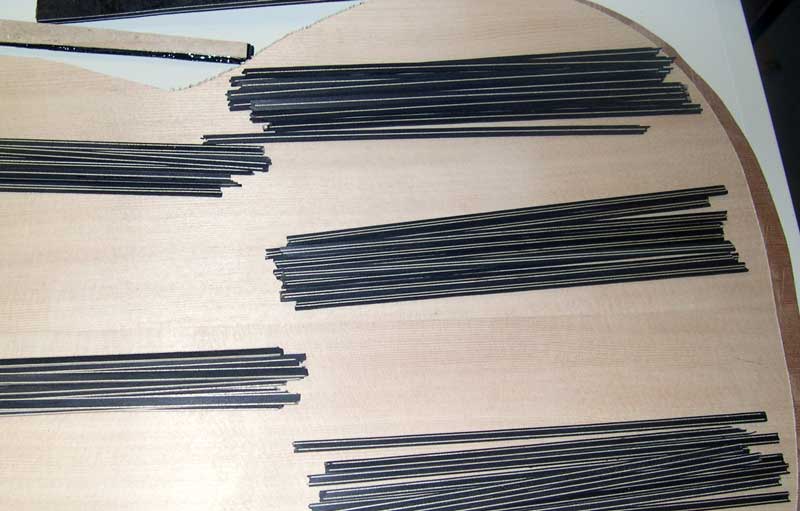
Individual veneer strips make up the sandwich--ready to glue up into final log which tiles will be cut from


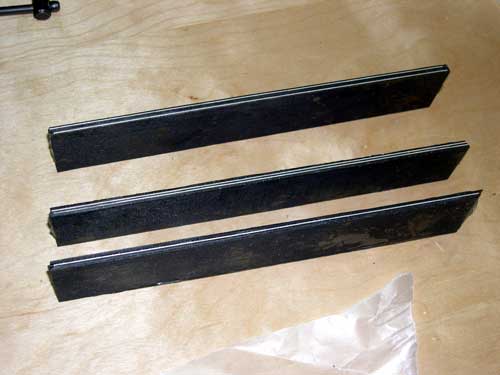
Piece of log. Tiles are cut from the end making the final pattern in the endgrain section


Sanding the glued veneer for my rope borders


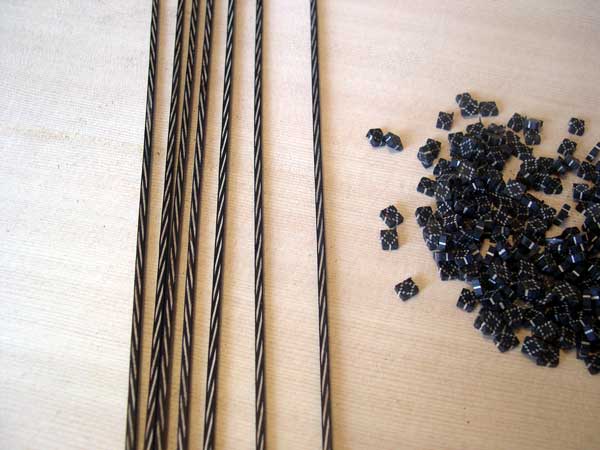
Completed tiles and ropes ready to be inlaid into the soundboard to complete the rosette


Sorry for the long post, hopefully you find it interesting.

Cheers!

John

Author:  JJ Donohue [ Fri Feb 10, 2006 9:06 am ]
Post subject: 

Wow, John!!! Fascinating process. I know you're a classical guy but there are some interesting concepts that would look cool on any style guitar.

Thanks for sharing.

Author:  Serge Poirier [ Fri Feb 10, 2006 9:14 am ]
Post subject: 

Thanks for sharing John, very cool post and if you don't mind, i saved it!

Serge

Author:  Anthony Z [ Fri Feb 10, 2006 10:08 am ]
Post subject: 

Nice work and excellent pictorial. Thank you for sharing.

Author:  RussellR [ Fri Feb 10, 2006 10:42 am ]
Post subject: 

Yes thanks John

I love your Rope

Author:  LarryH [ Fri Feb 10, 2006 2:41 pm ]
Post subject: 

[QUOTE=John Elshaw]
Sorry for the long post, hopefully you find it interesting.

Cheers!

John[/QUOTE]

John. Please don't apologize for the long post, it means a lot to be able to see some fairly arcane processes.

thaks

larry

Author:  John How [ Fri Feb 10, 2006 3:41 pm ]
Post subject: 

Very nice John, I am in the process of doing (or tryng) a rosette in similar fashion. It is quite time consuming to glue all this stuff up but hopefully it'll come together and make it worthwhile. Keep up the good work.

Author:  Cocephus [ Fri Feb 10, 2006 6:18 pm ]
Post subject: 

Whadyamean long post? Very informative! Did yo have trouble with uniformity of the thicknesses of each layer in your rope? I tried some herringbone a couple weeks ago and had trouble with the pattern running off after about an inch or so. I did in fact use titebond. Reckon that`s the culprit? Thanks for posting!

Author:  Colin S [ Fri Feb 10, 2006 8:45 pm ]
Post subject: 

Thanks for the post John, very timely, I'm just in the process of working on a Torres style rossette and you've given me some great ideas on 'how to'. I've got to make some rope and you've now shown me how. I'm a great fan of the drill press sanding disc, another use is always welcome. Great stuff.

Colin

Author:  ggdelazzer [ Fri Feb 10, 2006 8:50 pm ]
Post subject: 

VERY nice job John, you make it so simple; I'm shure I will need much more than a day off from work to make mine
Luigi

Author:  1bordeaux [ Sat Feb 11, 2006 5:20 am ]
Post subject: 

Wow! that makes inlay seem easy...

Author:  Terry Stowell [ Sat Feb 11, 2006 5:32 am ]
Post subject: 

Hey, this needs to go into the jigs, tools, & techniques section. And maybe re-name this thread as "How to make....Pics inside"

Great pictorial John. This stuff really contibutes to the whole community. Thank you

Author:  Don A [ Sat Feb 11, 2006 6:59 am ]
Post subject: 

John, thanks for taking the time to document the process.     It is always better to see the devil in the details and I'm betting that guitar is going to look great. Oh, and by the way, you are using a push block arent' ya!

Author:  John Elshaw [ Sat Feb 11, 2006 3:49 pm ]
Post subject: 

Thanks for all kudos guys.

I did have a little bit of runout on the rope, but only through the last inch on the end. I always make the ropes a couple inches longer so I can trim the ends off if they're a little thin. One way around this is to a use a couple solid wood parallelograms during the glue-up. This helps keep everything square and even while cutting on the saw. I didn't post pics of that but I will if I can dig up a few photos.

Cheers!

John

Author:  Serge Poirier [ Sat Feb 11, 2006 4:12 pm ]
Post subject: 

Thanks again John and looking forward to see the prallellogram at work!

Serge

Author:  Roy O [ Sat Feb 11, 2006 5:01 pm ]
Post subject: 

Thanks John. Looks like a lot of work but a very nice end result.

I agree with Terry. This should go up in the "how to" section of this website.

Thanks for sharing.

Author:  Robbie O'Brien [ Sun Feb 12, 2006 3:06 am ]
Post subject: 

Nice job John! Thanks for sharing!!

Author:  Don Williams [ Sun Feb 12, 2006 5:52 am ]
Post subject: 

Cool! I love that binding!!!!

That reminds me...a few months ago, the NEL group got to see Alan Carruth demonstrate how he makes his amazing mozaic rosettes, including those fabulous maple leafs and such. Goodness, the man is a Master at it....


Don Williams38760.5788541667

Author:  John Elshaw [ Sun Feb 12, 2006 7:03 am ]
Post subject: 

Wow, are those little leaves in the binding and outside of the rosette miniature tiles? I've seen that rosette before and was under the impression that they were inlayed whole pieces, not tiles. That's an amazing rosette, and I feel his pain in the amount of time it must have taken him.

John

Author:  Serge Poirier [ Sun Feb 12, 2006 7:51 am ]
Post subject: 

That - is- some--MAS-TER-PIECE!!!!!!!!

Page 1 of 1 All times are UTC - 5 hours
Powered by phpBB® Forum Software © phpBB Group
http://www.phpbb.com/